I've been a bit lazy with the updates recently, here's a summary of what we've done
I've fitted one of the new pair of water tanks, the picture shows the freshly painted frame in which it is now sitting. Mudlark had one large tank (200 gallon) on the starboard side, so she lent one to one side with it full, and the other with it empty!
I've had two tanks made, one for each side so she will be better balanced
We've given the aft cabin a clean, and I've scraped and painted the underside of the deck. which will stop the flakes of paint falling in the bunk below :)
Dad has been scraping away at the next section of the forward cabin, I tried to get an action shot, but the light was poor.
Happy new year :)
Friday, 31 December 2010
Saturday, 25 December 2010
Happy Christmas
Sunday, 12 December 2010
mince pies
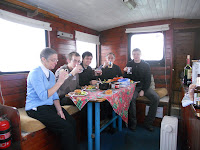
This weekend I've been mostly eating mince pies :)
I invited friends over for mulled wine and mince pies, as well as the grand tour
Tom and Fi gave me a hand to tidy the tools away, and put a new cover over the stern, the old one has far too many holes which let the rain pass straight through it!
I've moved the "workshop" into the front cabin so we can lift the floor boards and clean the next section of the bilges
Saturday, 4 December 2010
I've shaken the snow off the covers, and everything is thawing out :)
This afternoon I fitted a metal plate to close the hole where the chimney for the stove leaves the cabin. Luckily I managed to find some bits of metal the right size at work :)
Then I cleaned the ballast and put it back in the bilges of the forward cabin the small weights are around 50lbs each. I put the floor boards back in place after I took the picture.
Sunday, 21 November 2010
brightening up the bilges
This week we've started cleaning up the bilges, It's going to be a long job (52 feet long to be precise) The first cabin has been stripped completely the beds, floor boards and ballast have all been moved out the way. Myself, Dad, Juan and Neil have all had a go at the first section.
There was some wood work needed, I had to replace 7 feet of the second stringer,
(the new bit of wood in the picture) and Dad fixed a broken rib.
Today (sunday) I put the first coat of paint on the parts we've cleaned. Meanwhile Dad has rigged a cover over the stern, and started sorting out the woodwork there. You can just see the blue cover at the back of the boat.
If you need translation, here's a link to the past:
http://www.ageofsail.net/aostermi.asp
Sunday, 14 November 2010
wet weekend
This weekend has been spent either putting paint on, or scraping it off!
We have scraped and then primed the inside of the hull in the foward cabin, then lifted the floor boards and started cleaning the bilge.
here is a pic, halfway through scraping off 50 years of paintAnd here is Juan painting a section of the hull near the stairs
We have scraped and then primed the inside of the hull in the foward cabin, then lifted the floor boards and started cleaning the bilge.
here is a pic, halfway through scraping off 50 years of paintAnd here is Juan painting a section of the hull near the stairs
Sunday, 7 November 2010
Off with the cover!
Now I've got the fittings back on the deck, I've removed the cover from the front of the boat. The next step is to re paint the guard rails
We've also been busy inside, it's not just the outside that needs painting!
this pic shows the underside of the starboard side deck, where I have just fitted a new piece of threaded rod. These rods tie the deck beams together
We've also been busy inside, it's not just the outside that needs painting!
this pic shows the underside of the starboard side deck, where I have just fitted a new piece of threaded rod. These rods tie the deck beams together
Sunday, 31 October 2010
Monday, 25 October 2010
I've been a bit busy this week, so I'm late updating here!
At the weekend I re fitted the anchor windlass to the foredeck which involved cutting the 3" hole for the chain to pass through the deck and supporting timber
I've also been working on replacing the timber by the door to the engine room, but I haven't got any decent pictures yet!
At the weekend I re fitted the anchor windlass to the foredeck which involved cutting the 3" hole for the chain to pass through the deck and supporting timber
I've also been working on replacing the timber by the door to the engine room, but I haven't got any decent pictures yet!
Sunday, 17 October 2010
working under cover
This weekend I've been working on the foredeck, On Saturday trial fitted the new Knees (angled brackets) that I made last week.
Today I painted the last parts of the deck both sides and up to the bow :)
Here's the port side in, finally with deck paint!
And here is the bow, the holes are for the anchor windlass and samson post which I will re-fit soon
Today I painted the last parts of the deck both sides and up to the bow :)
Here's the port side in, finally with deck paint!
And here is the bow, the holes are for the anchor windlass and samson post which I will re-fit soon
Sunday, 10 October 2010
I finally got a pic of last weekends work! here is the starboard side with the cover removed, and freshly painted guard rail
And here's dad painting the wheelhouse roof!
This weekend I've been epoxy coating the plywood on the rest of the deck, under the cover. It was dark by the time I'd finished today, so I'll have to take pics another day
And here's dad painting the wheelhouse roof!
This weekend I've been epoxy coating the plywood on the rest of the deck, under the cover. It was dark by the time I'd finished today, so I'll have to take pics another day
Monday, 4 October 2010
Sunday was too wet to do much on the outside of the boat, so we've did some more woodwork on the inside.
This evening I put the second coat of paint on the deck, so the cover will be coming off the side of the boat later this week :)
I'll get some decent pictures of what we've been up to when it's daylight and not raining
This evening I put the second coat of paint on the deck, so the cover will be coming off the side of the boat later this week :)
I'll get some decent pictures of what we've been up to when it's daylight and not raining
Saturday, 2 October 2010
Saturday, 25 September 2010
now with added epoxy!
Monday, 20 September 2010
I didn't find time to update the blog this weekend, so here's a quick version of where we've got to:
Saturday afternoon, we are laying the plywood on the deck, working our way aftWe managed to lay all but the last board on Saturday, I had cut it out ready to fit on sunday.
Finally here we are on Sunday afternoon, looking towards the bow, with the deck finally covered in plywood, dad fitted a piece of Iroko to cover the ends of the planks, while I coated the new plywood with epoxy resin
Sunday, 12 September 2010
We're getting there, dad has been working on the last part of the deck, there's a few bits of wood that need replacing.
I've fitted the plywood to half the starboard side, as far as the wheel house door, so the end is in sight :)
After putting the plywood on the deck, I put another coat of grey paint on the port guardrail.
I've fitted the plywood to half the starboard side, as far as the wheel house door, so the end is in sight :)
After putting the plywood on the deck, I put another coat of grey paint on the port guardrail.
Wednesday, 8 September 2010
busy bunnies
We've been doing lots of things this week, trying to move foward on all fronts!
Here dad is painting the guard rail so it can be put back on the port side.
We've put covers over the starboard side so we can work on the deck
Here is the guard rail that dad was painting in the earlier pic, in place on the port side, this part of the deck is almost done :)
I've glued pieces of wood to the deck to lift the bottom of the guard rail, and allow water to run off over the side of the boat, instead of forming a nice puddle
Saturday, 4 September 2010
a change of tack!
We've finally started putting the plywood onto the starboard side of the deck!
I sanded down the planking this morning, and laid the first bit of plywood after lunch, the transom is in sight :)
here the deck is sanded ready for the plywood to go on top (looking towards the bow)
I sanded down the planking this morning, and laid the first bit of plywood after lunch, the transom is in sight :)
here the deck is sanded ready for the plywood to go on top (looking towards the bow)
Saturday, 21 August 2010
we've been working on the starboard side deck (that's the right side) Luckily it's in much better condition than the port side.
I've replaced a piece of timber under the deck, the end of the beam which runs under the windows had rotten away, where it met the large beam (which we also had to replace)
Dad has been working on the deck as well, here he is ripping off the old canvas
I've replaced a piece of timber under the deck, the end of the beam which runs under the windows had rotten away, where it met the large beam (which we also had to replace)
Dad has been working on the deck as well, here he is ripping off the old canvas
Sunday, 15 August 2010
We've made a lot of progress this week, we've fitted new timber under the port side deck, which joins the piece fitted last week, here it is clamped up while the glue cures:Putting that timber in place allowed me to carry on gluing plywood on top of the deck (it feels much more rigid now)
We made it all the way to the bow! cause for celebration :)
Sunday, 8 August 2010
It feels like we've rebuilt the front of the boat! we've just fitted the next piece of the jigsaw.
Here we are halfway through fitting the new beam to support the aft end of the foredeck, propped in place to check the fit
and here it is in place, it's a 4" square piece of sapele which goes the full width of the deck, and joins to the piece we fitted yesterday.
After getting it in place we sat down in the sunshine with a beer to celebrate :)
Saturday, 7 August 2010
Sunday, 1 August 2010
Once I'd found my keys in the bottom of my bag (don't laugh, I cycled across Southampton looking for them this morning!) I sanded and painted the port side deck with grey non slip deck paint.
Then I removed the mountings for the deck crane, which were welded onto the roof of the forward cabin. luckily it didn't put up much of a fight.This cleared the deck ready for dad to replace a botched repair job underneath.
After a tea break I fitted a new section of wood below the window in the galley, as I've done in the aft cabin.
Saturday, 31 July 2010
I've dismantled the deck crane on the foredeck, to allow dad to work on the deck that it sits on. It's mounting holes have let rain water in, so we've got some repairs to do before I can glue the plywood over the fore deck.
I also put something together today! on the port side deck I've screwed and glued some 1" thick pieces of iroko to create a gap for water to drain under the guard rail.
Saturday, 24 July 2010
progress
Tuesday, 20 July 2010
carry on caulking!
I've just taken monday off, to get some work done on the boat. I managed to sand and caulk the port side deck as far as the front of the wheel house.
First you hammer caulking cotton into the seam before covering it with sealing compound to finish the job.
Now I'm ready to put some more plywood onto the deck :)
First you hammer caulking cotton into the seam before covering it with sealing compound to finish the job.
Now I'm ready to put some more plywood onto the deck :)
Sunday, 11 July 2010
working on the decks
I've been taking advantage of the sunny weather, and have been getting the decks sorted out :) I started at the aft end on the port side, and stripped the canvas off during the week, so it had some time to dry out before I re caulked the seams, and covered it with plywood to make it weatherproof once more!
On Saturday I sanded the planks , and caulked (sealed) the gaps between them
Today we fitted the first 12' of plywood to the deck.
On the left is the new plywood, centre is the sanded and caulked deck, and on the right is some flaky old canvas (which I've now removed)
On Saturday I sanded the planks , and caulked (sealed) the gaps between them
Today we fitted the first 12' of plywood to the deck.
On the left is the new plywood, centre is the sanded and caulked deck, and on the right is some flaky old canvas (which I've now removed)
Subscribe to:
Posts (Atom)